Dumping & Flashing the Lite on DG-16D2S-09C FW Ver:83850C & Liteon 93450C WARNING!!Do at your own risk
This mod is very advanced! Acidmods.com is NOT responsible for any damage done to your DVD drive or Xbox 360.
Do at your own risk!!
Introduction This tutorial will teach you to flash and dump a DG-16D2S-09C Lite on Xbox 360 DVD Drive.
Flashing will enable the ability to use backup's of your games and other cool things.
Try this at your own risk!
Parts Needed- -- DVD Drive
-- Mini On/Off Switch (
http://www.radioshack.com/product/index.jsp?productId=2062498)
-- 22 ohm 1/2W 5% Carbon Film Resistor (
http://www.radioshack.com/product/index.jsp?productId=2062311)
*-- VIA VT6421A chipset card (
https://acidmods.com/shop/product_info.php?cPath=12&products_id=99)
*- You don't NEED this but this will make it alot more simple to do!
Tools Needed- -- Carbon Pen (Recommended for removing solder mask!) (
Link)
-- Exacto Knife/ Razor blade
*-- 360Xtractor Pro v1.2 (
https://acidmods.com/shop/product_info.php?cPath=12&products_id=102)
-- Soldering Iron & Solder
*- You don't NEED this but this will make it alot more simple to do!
Software Needed- -- JungleFlasher 1.67B Download Link-
http://jungleflasher.net/files/JungleFlasher.0.1.67.Beta.rarAverage Time To Complete- About 2-3 hours
Difficulty Rating-5/5
Step By Step Tutorial-Ok first we need to open the 360. This tutorial can be found here-
https://www.acidmods.com/forum/index.php/topic,32902.0.html which is supplied by our good friend, Modded Matt.
Next we grab out our DVD drive by unplugging the Sata and Molex power plugs.
Notice the Model and Firmware of the drive.
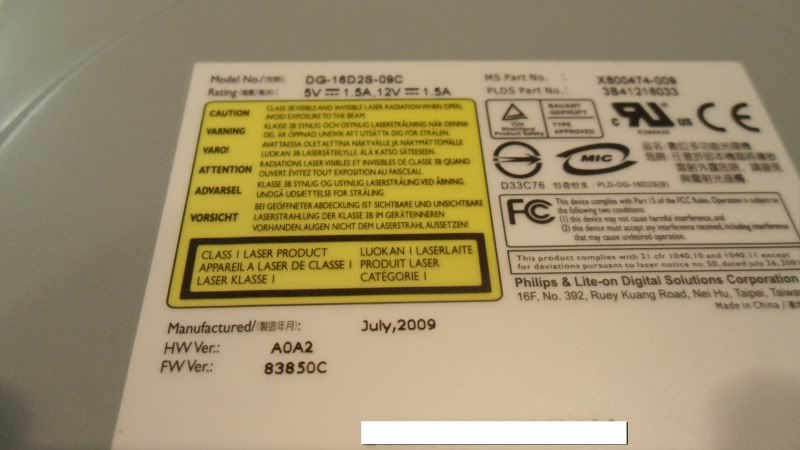

Then flip over the drive and find the 4 screws holding the Drive together and remove them.
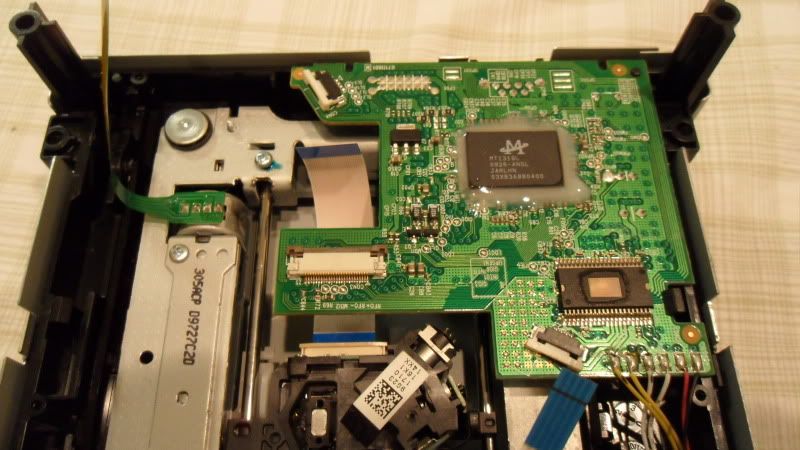
Next unplug all of the zif connectors by sliding them out of place and pulling out the plugs.
**Note : There are 2 screws holding the Board in place removed them **
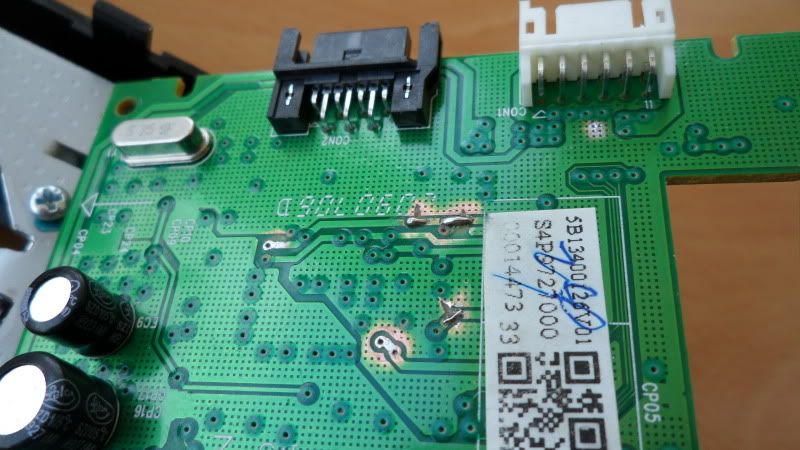
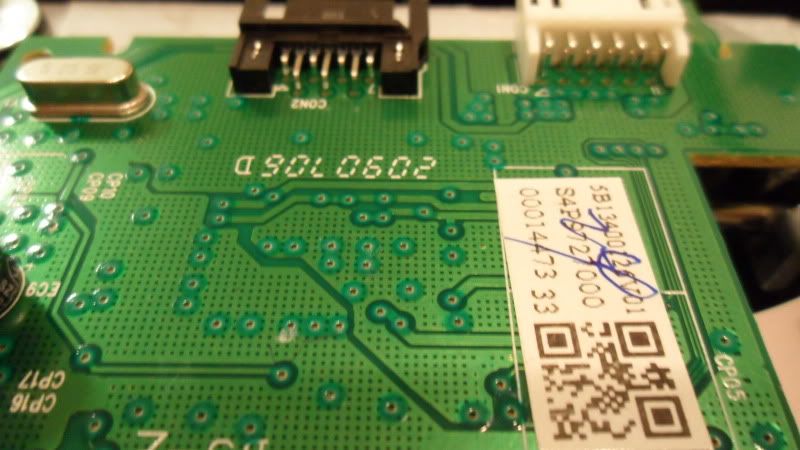
Now flip the board over and find this spot- (Notice the caps and sticker)
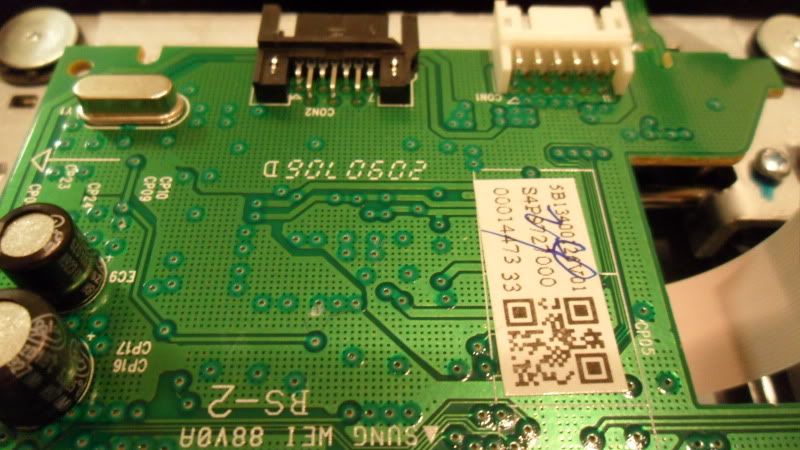
A closer picture of the spot we are going to be doing work on.
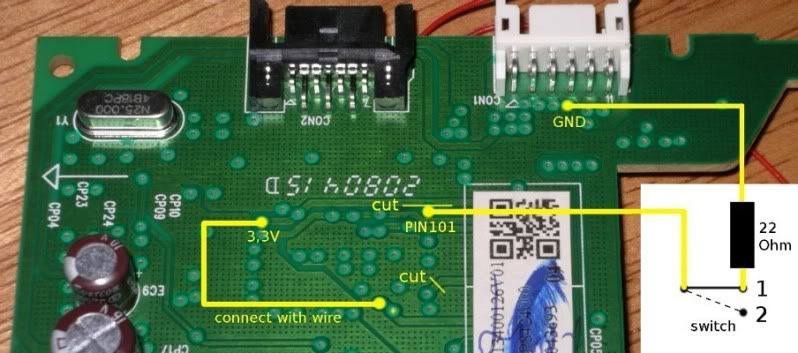
Here is a basic diagram of what we have to do-
First we clean up the spots using our carbon pen or if you dont have one, use a razor (BE VERY CAREFUL!)
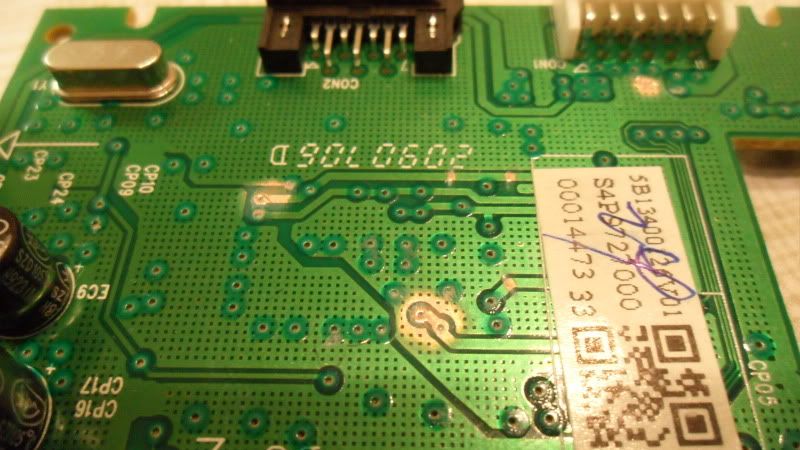
Next cut the spots shown in the diagram like so-
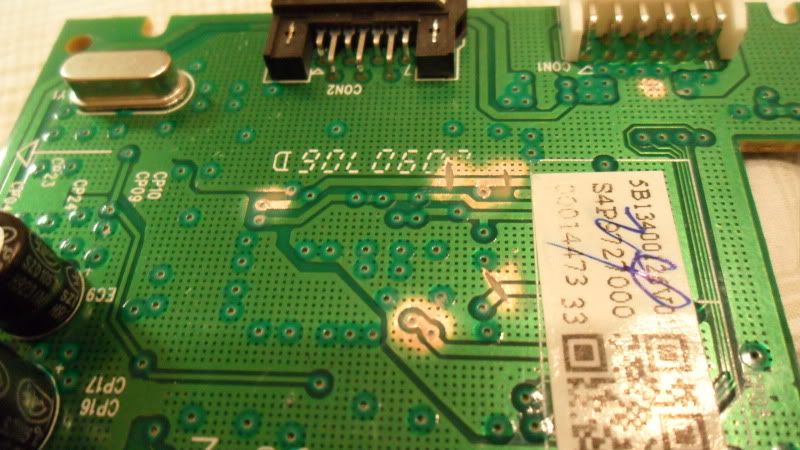
Now solder the wires on the board like so-
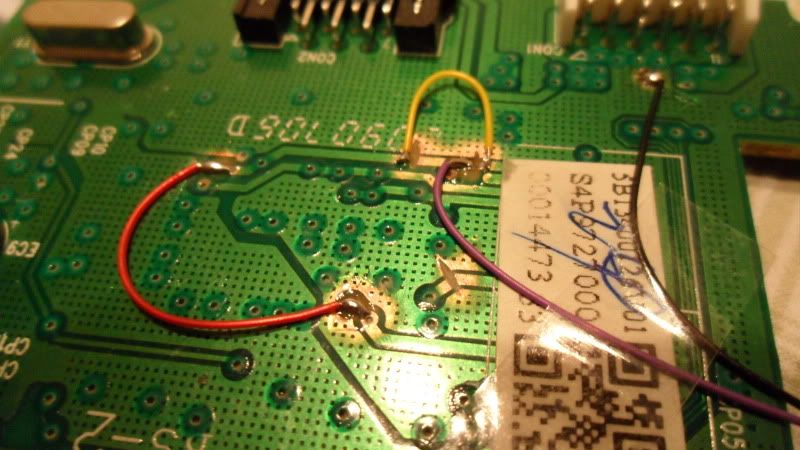
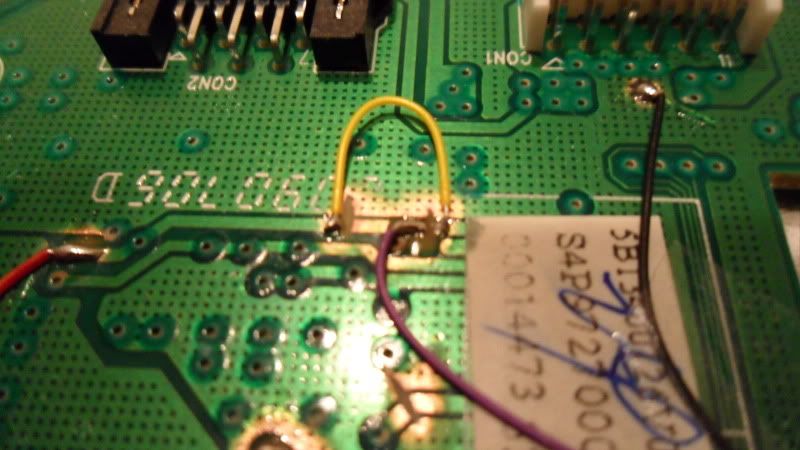

Make sure there is about 1 foot of wire coming off of the purple and black wire!
Now just close up the DVD Drive makeing sure to plug in all of the Zif's and make sure everything looks like it was in the begining.
ALSO, make sure to cover up the solder spots with some electrical tape or something to prevent shorts in the drive. (That is bad.)
Have the Purple and black wire come out of the drive like so-
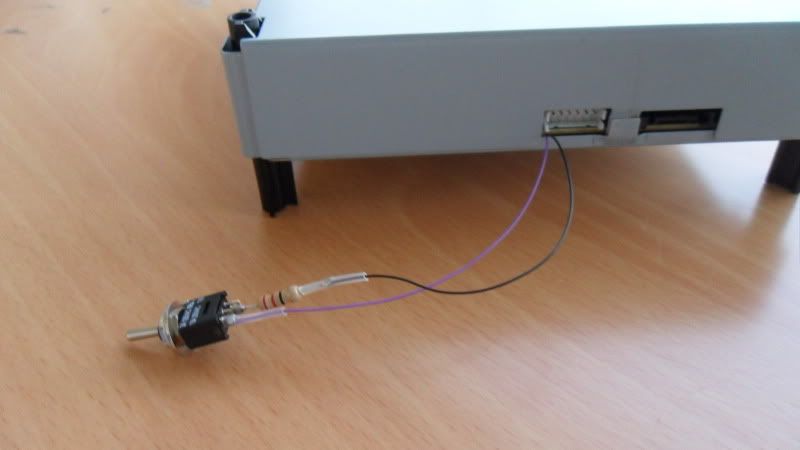
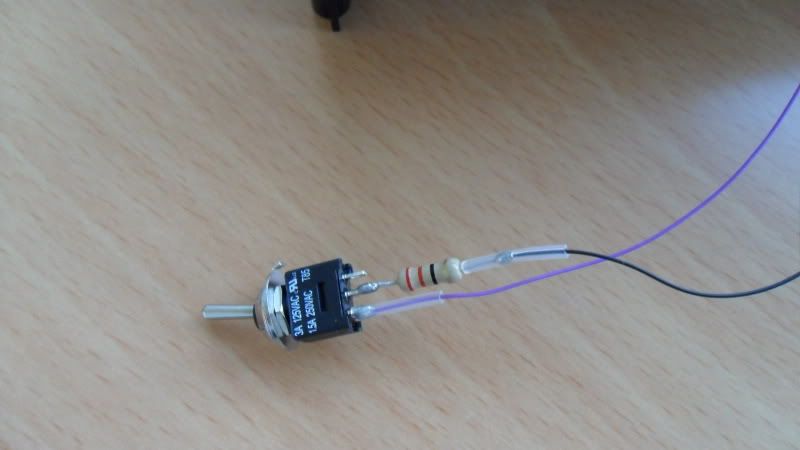
Now Wire up The GND [Black Wire] to A 22~Ohm Resister than to one of the pin on the Switch and Pin 101 [Purple Wire] to another pin on the Switch like so-
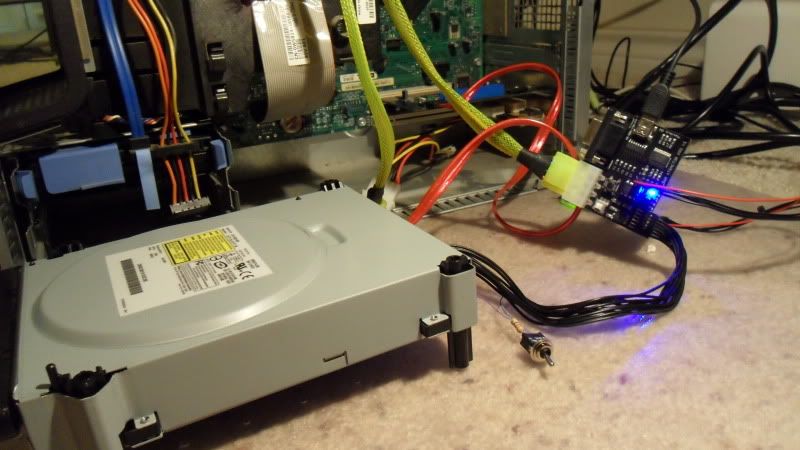
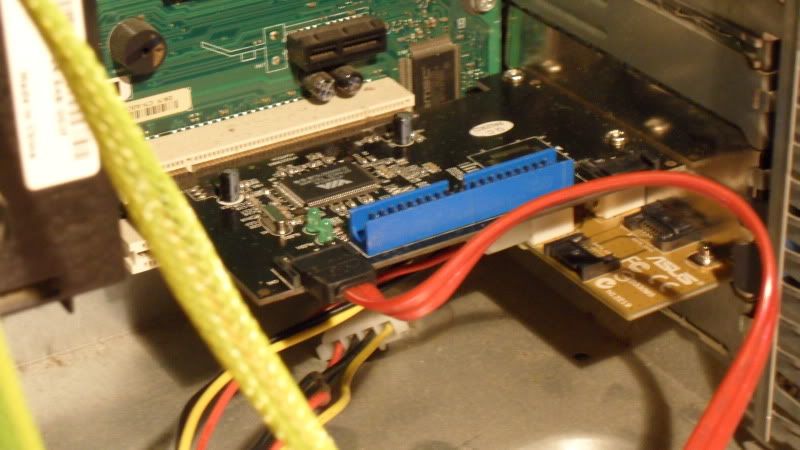
Connect the drive up to the VIA VT6421A chipset card and 360Xtractor Pro v1.2-
 Video Part One: The Dumping Of the Original FW and Key "Lite on DG-16D2S-09C FW Ver:83850C " Dumping the Lite on DG-16D2S-09C FW Ver:83850C TutorialNow that we have our key remove the switch and fix all the cut trace's and put the drive back together.