PSP jewel installation and lighting
Introductionwhy put a customised jewel in your psp? well why not, your psp will be the shiznit. This tutorial includes basic psp disasembly, fitting the jewel and lighting it. For info on cutting UMD door to size see this tutorial
https://www.acidmods.com/forum/index.php?topic=27385.msg201958#msg201958
Parts Needed - jewel
- 2 0603 led's soldered to 30awg wire
- psp (duh!)
Tools Needed - Solder Iron
- Solder
- dremmel (or other method to cut the door)
- tools for disasembling the psp and removing the UMD door
Difficulty rating: 3/5
Average Time to Complete: i.e 1-1.5 hour(s)
Notes: Be ultra carefull removing the door, precision is the key to all modding.
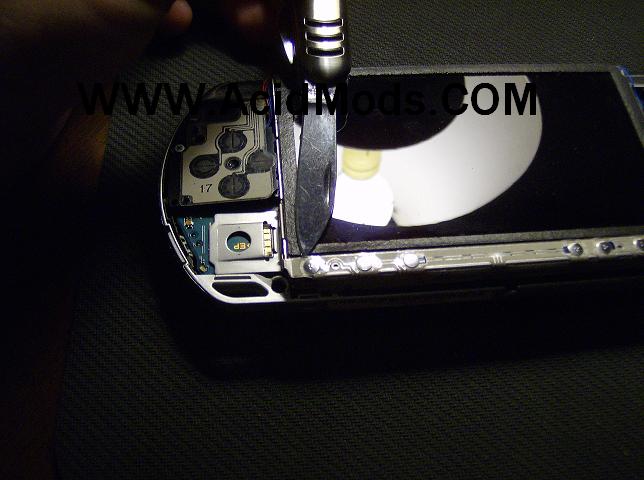
Step By Step Tutorial1- Step one remove the button bar. Place a blade gently between the button bar and LCD and pry upward.
2- Next remove the ribbon cable by prying the small tab up (away from the side the cable is inserted). Once the tab is up gently pull the ribbon cable out. Don't worry about the wiring chart that is for later.
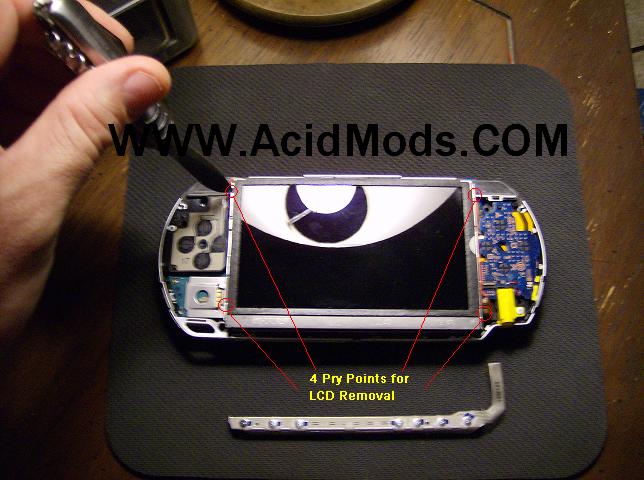
3- Next using a knife pry outward at each of the for points releasing the LCD.
4- Next flip the LCD over to reveal the ribbon cables. Remove the small cable by lifting the tab in the opposite direction as the button bar (this tab open from the opposite side of the cable). Once the tab is up, gently remove the cable. Now lift the tab on the big ribbon cable - this one opens just like the button bar cable. Once open, gently remove the cable. Now remove the LCD and set it aside.
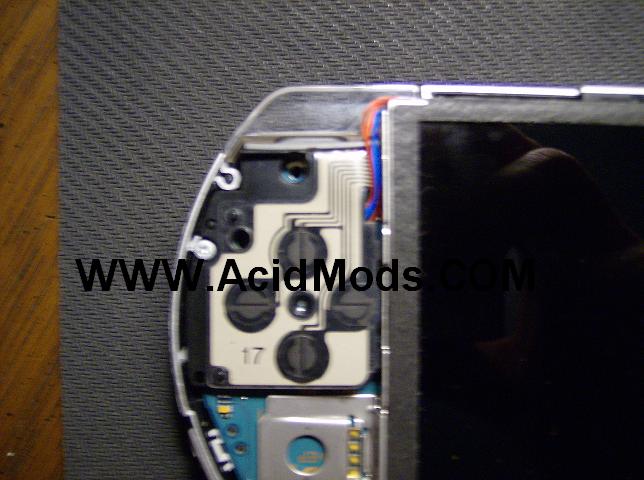
5- Remove the D-Pad by removing the silver screw, then remove the ribbon cable like the button bar.
6- Remove all these screws to remove the LCD cage. You may have to wiggle it to get the cage off.
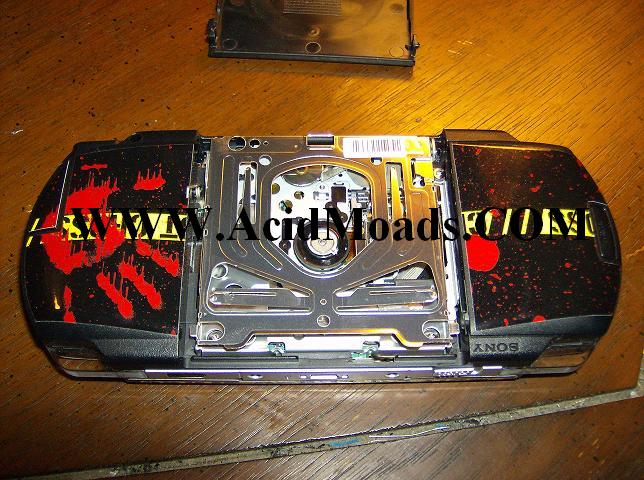
7- Using a knife pry at this point to remove the UMD door
8- Once this side is free you can now wiggle the other side loose and remove the door.
9- Once door is removed you can start cutting a hole.
10- If you haven't cut a circle see "Cutting UMD door tutorial".

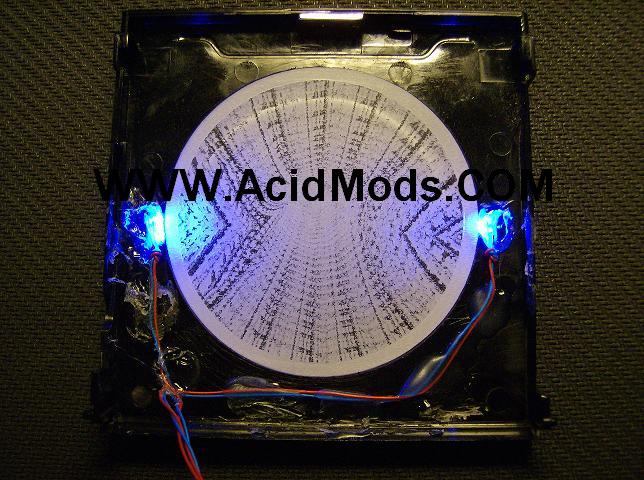
11- Place the jewel in the hole so there is no edge on the outside of the door. Optional: you may run super glue all around the jewel for a permanent placement - I like to leave mine unglued so I may change it out later. Now gluing the LEDs is easy. Once you have the hot glue gun ready, place a dab of glue on the side then place the LED into the glue making sure to have the LEDs facing the jewel. Then glue down the wires as seen in the pictures. It is important that the wires meet at this side. If you have not made you LEDs ready, check out "Soldering 101".
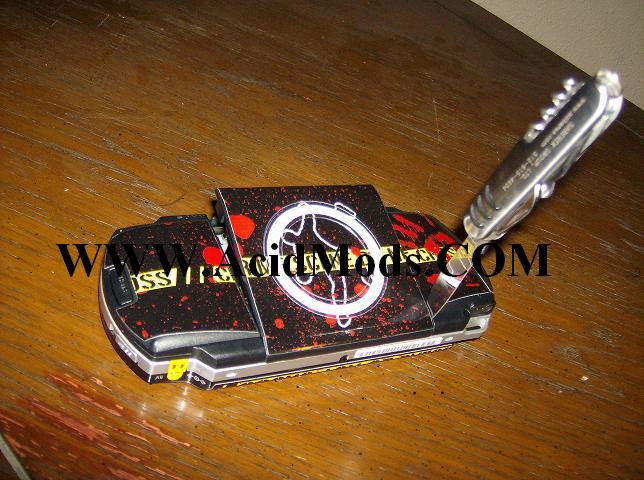
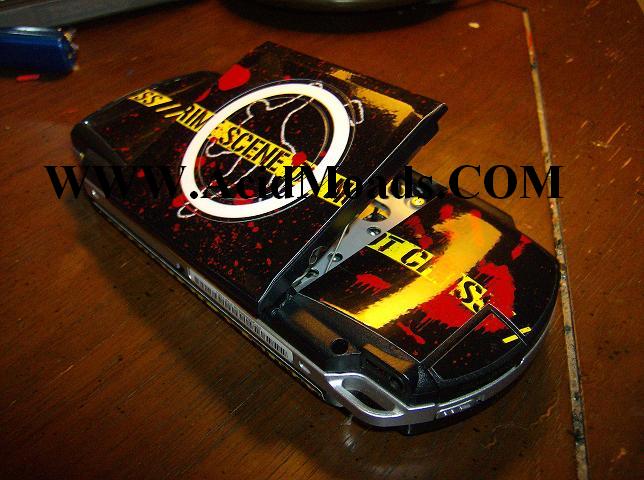
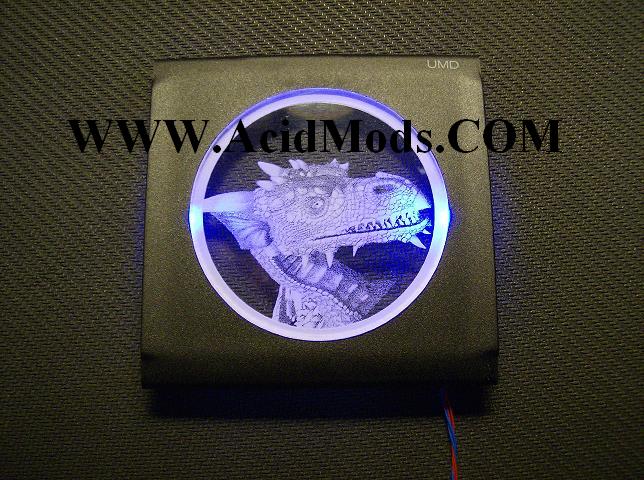
12- Here is what it looks like with one of my jewels..
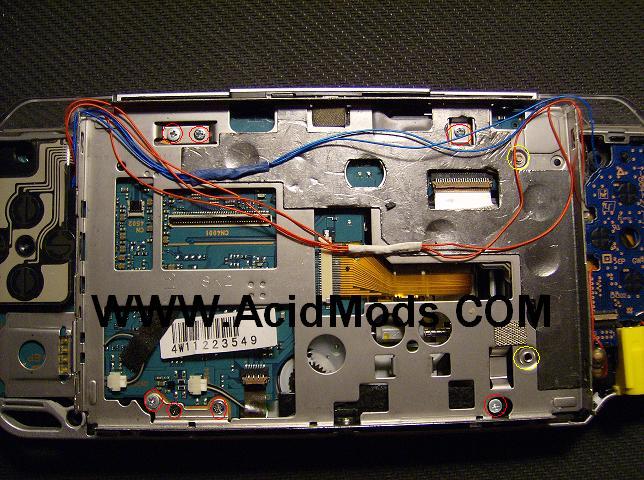
13- Here is how you route the UMD door wires. You may lift the mother board on the corner to run the wires underneath. Be sure to line up the switch for the WIFI when putting the mother board back down.
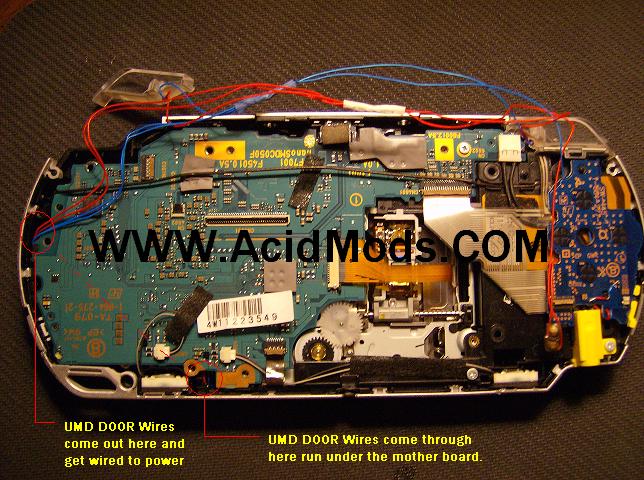
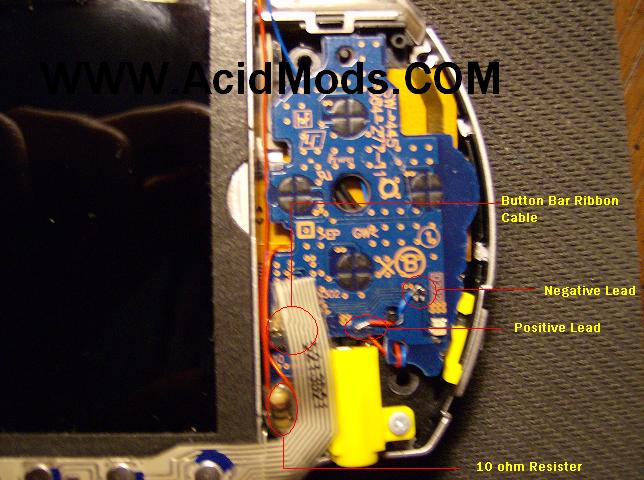
14- Wiring it all up. Well here are all the points you need to hit.

15- close it all up and your psp is sweet
FAQ/ Troubleshootingthats due to careless following and executing of step 7. You will need to buy a new UMD door.
- My jewel doesn't light up
-somewhere there is a short between the wires and the psp.
-your led is wired backwards
-you soldered to the wrong spot
-your solder joints arn't very good.
I didn't Write this tutorial, just fixed it up and finished it.


