First off, I did not write this tutorial nor do I take any credit for it at all. This was written entirely by
halopro77 on se7ensins.com
Hello se7en sins. This is my first tutorial on something neat I did today. So I've been wanting to play on my PC with my wireless controller, but Microsoft won't release the drivers to play on PC via play and charge, so I took matters in my own hands.
Things you will need:
Soldering Iron
Soldering Flux
An Xbox 360 RF Module (Ring of light board at the front of the Xbox)
An old USB you don't care about
5v Diode
Driver for the receiver
A brain
OPTIONAL: Play and charge kit to sync controller to board anytime you want to
Before we go on, I have to warn you that you MUST sync your controller to the RF Module via Xbox before you move on. You don't have to worry about this if you have a play and charge.
STEPS:
Cut the USB with scissors keeping the male part and at least 6 inches of wire.
Strip the wire down to the 4 basic wires inside (Red, White, Green, and Black)
Strip those wires down to what ever length you feel comfortable with (Cut the red wire the shortest because the diode goes on this one)
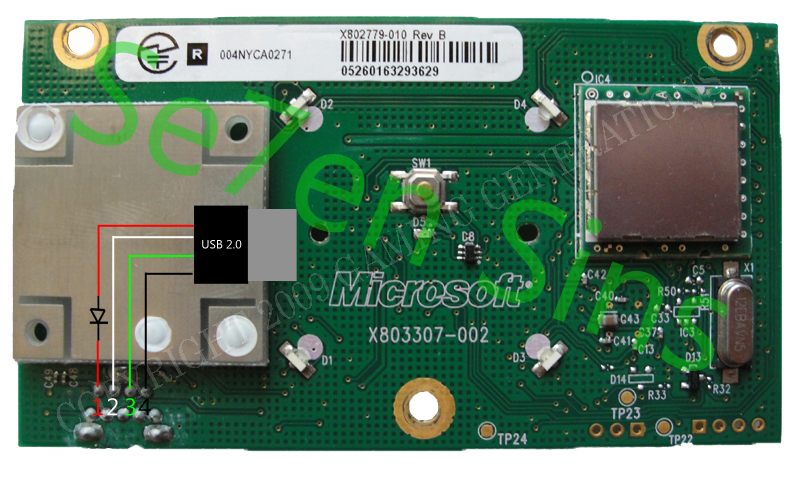
Solder on the diode to the red wire (Look below for diagram)
Now follow this image I made;

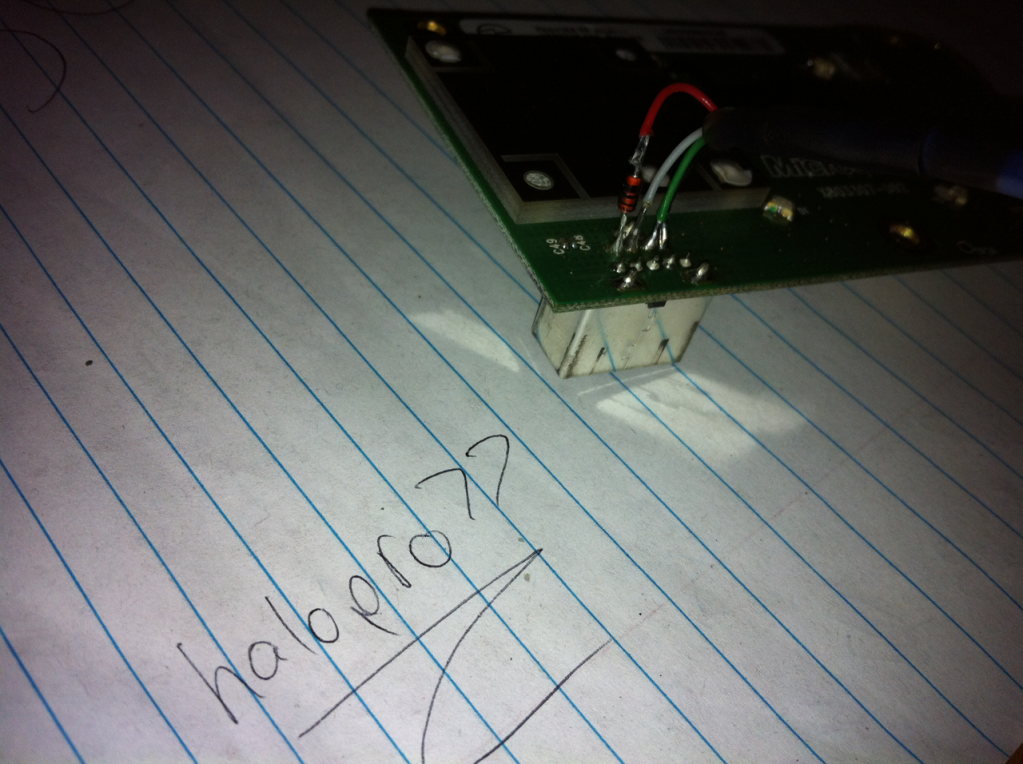
This should be your final product;

(The black wire is kinda hiding)
Lets go to the PC portion. First download the official Microsoft wireless receiver driver from the top and install it normally.
Now watch this video:
How to make a homemade Xbox 360 wireless controller receiverTo sync a controller either; A) sync the controller by plugging in the RF Module in an Xbox and sync with the Xbox's sync button, or B) Plug in the controller via play and charge while the ghetto receiver is in.